
As detailed in the last post, I bought a bunch of stuff. Of course, I don't like to make things too easy on myself, so it wasn't as simple as bolting on the Koni 2812's and sticking the OS Giken diff in the rear end. Let's start with the dampers.
The dampers were mostly good to go right out of the box, but I wanted some work to do. The first thing I did was have my friend Allen (who owns the turbo Miata discussed here) run them on a shock dyno along with my old Koni Yellows so that I could baseline them and determine how healthy they were. I got a bunch of cool charts like this:

This was also helpful because it told me that one of the dampers was a little low on gas pressure. For those who don't know, gas charged monotube dampers like the Koni 2812 have a floating piston inside of them that moves up and down to allow the fluid chamber volume to stay constant as the piston rod enters the shock body through the damper's stroke. The floating piston is pushed on by high pressure nitrogen gas so that when the piston rod leaves again, it doesn't induce vacuum in the fluid which would cause air bubbles to precipitate out and make the damping forces really unpredictable. That's all clear? Good.
I could get the whole set rebuilt at some crazy cost, but since I'm cheap and don't like shipping stuff, I decided to just leave the old fluid since it seems to be damping ok and simply refresh the nitrogen gas charge in all the dampers. That sounds pretty simple, except that to keep a low profile on the damper body, Koni's charge port is just a hole with a bolt in it, which unlike a schrader valve has nothing to to thread a fill tool onto and requires a bunch of rotation of a socket head screw to open and close the "valve."
So I went to Harbor Freight, bought some cheap locking pliers and made a tool!

It's not that clever, since it's just copied from pictures I found of the actual Koni tool.
That upper part with the valve and knob sticking out of it creates a sealed chamber around the fill screw once it's clamped around the shock body, and then the knob is attached to an allen key sealed to the chamber for opening and closing. The idea is sound, except even with the smallest chamber that I could reasonably make, it still required 30+ pounds of pushing against the gas pressure to get the allen key seated in the screw and was also a little bit finicky about sealing against the shock body. So thanks to Allen for dealing with that for me!
So now the shocks are good as almost-new (which is different from almost good as new). Another annoying thing is that the adjusters for the front dampers are pretty hokey looking for super high end shocks. As far as I can tell, damping adjuster knobs are like the pride and joy of many damper manufacturers. They're usually really pretty machined and brightly anodized things. The Koni adjusters are basically nuts.

They're so tiny, I couldn't even turn them by hand!
Given how lazy I normally am, I probably would have just left them. However, one of them was lost in shipping and Koni wants $12 for these things! Really not so bad, but it was an excuse to make something cool. A little bit of machine time later, I had some nice knurled aluminum knobs that I didn't need tools to operate (picture later).
The last thing is actually something that I had put off from last season. I had installed spherical bearings in the rear shock tops, but that was easy stuff because it only needed very basic manual machine operations and a little bit of welding. The fronts would need new top hats made from scratch, so I actually got through about 1/3 of the fabrication on those and then set it aside for some reason. I decided to pick that back up and finish it. I first tried the lazy approach which was to finish them up with only a lathe operation.

But it turns out that shock tops are shaped like almost-triangles for a reason, and the reason is that circles don't fit. So I fired up the big machine and made them nice looking.

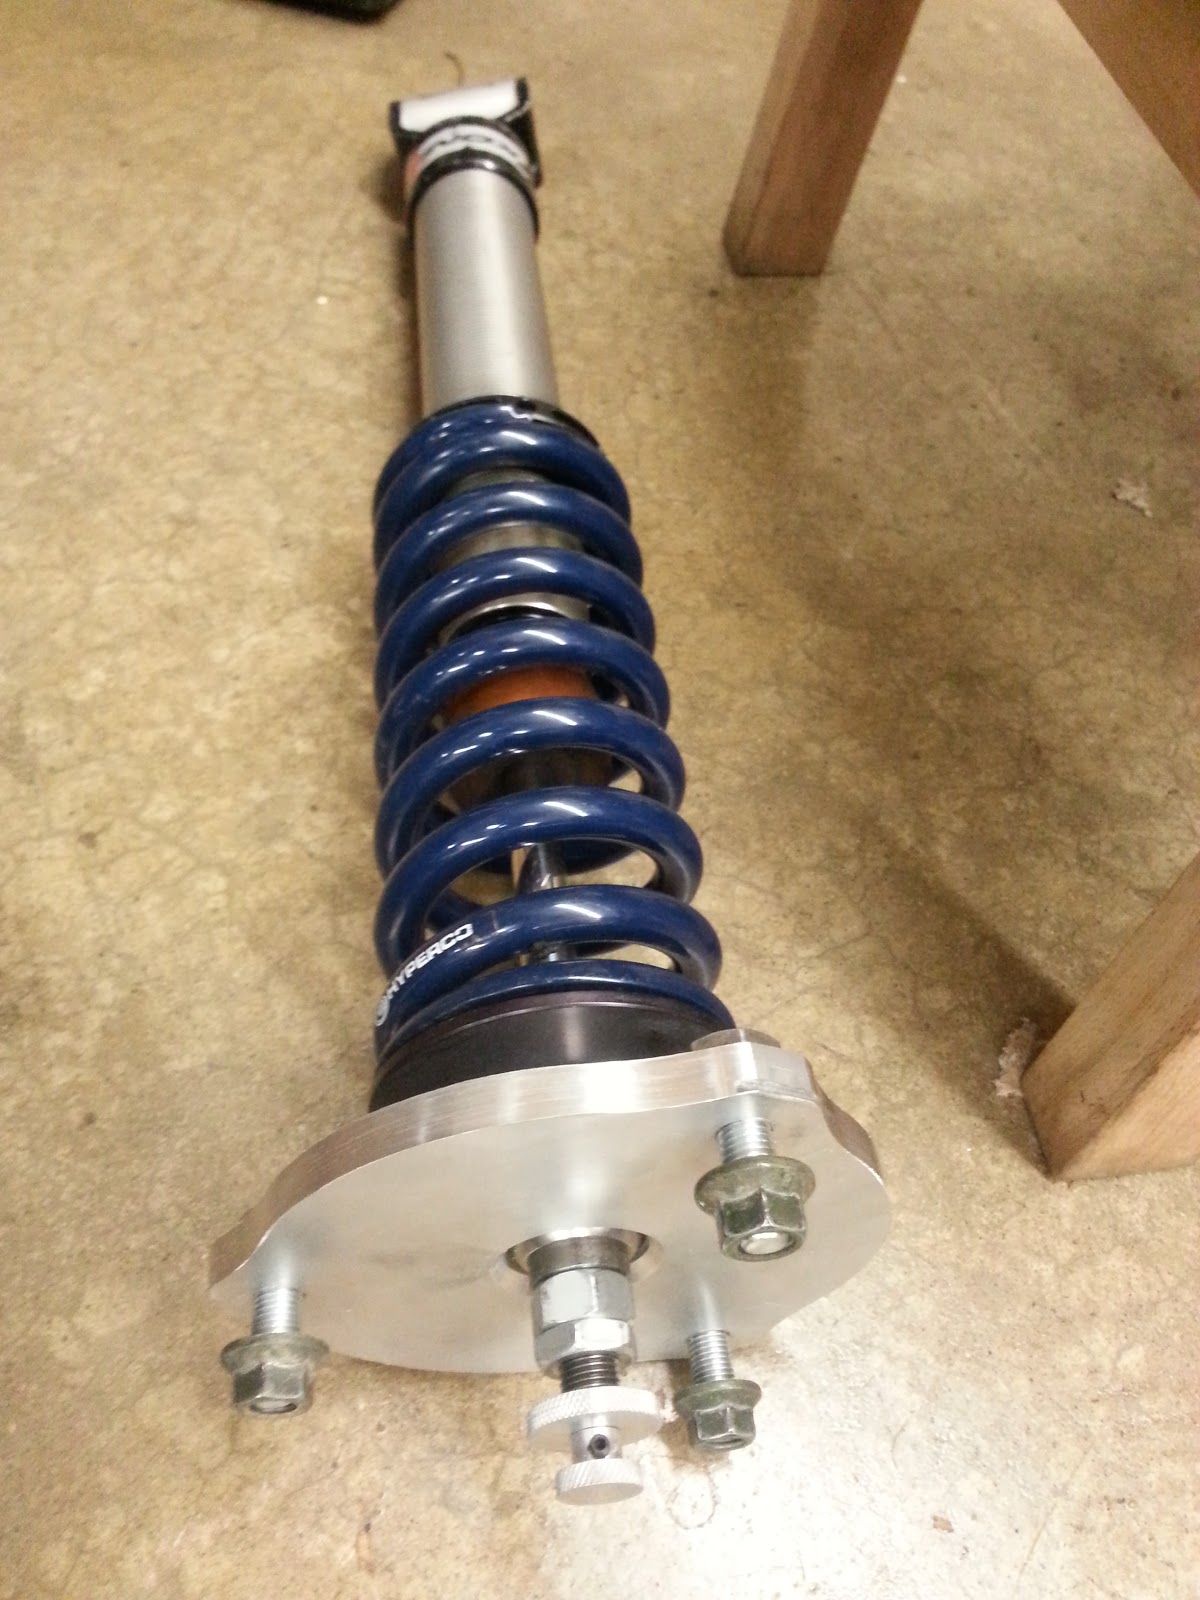
With those all done plus the fancy new adjusters, I assembled everything together for a nice photo.
Now on to the diff. This was pretty much just a bunch of wrenching. Step 1 was to take apart everything out back.


I actually disassembled more than you'd need to for just the diff, but I also wanted to change out my wheel studs, which for some stupid reason requires dismantling the rear upright and ruining a perfectly good set of wheel bearings. So Rob and I spent a couple of quality hours with a press doing that...

This is what happens when you try to remove the hub. The bearing is wrecked.

But it's nice enough to leave the race stuck on the hub...

Which needs to be carefully ground off

Just so I can put in some studs

Installation is the reverse of removal...
With that taken care of, we pulled out the diff and swapped it for the OS Giken unit. I really really didn't want to mess with setting lash because the RX-8 uses swappable shims to set both lash and bearing preload, and I didn't want to buy any, so I was just hoping that the carrier-bearing-to-ring-gear-mounting-distance would be exactly the same as stock...

OS Giken on the left, stock Torsen on the right. Height gauge in the back.
Turns out it was! So that was easy enough. We checked the lash just in case, but it of course required no adjustment.

A few hours in the garage later, and we got the rear end all buttoned up again.

That's Rob. People have trouble telling us apart because we're both Chinese.

Now it pretty much just needs an alignment and a wash, and it'll be ready to go a Test-n-Tune in April.
Hmm, I wonder if I can do this with my Koni 3011's. I'm pretty sure that I released some pressure from one of my rear shocks when I was playing around with them trying to figure out how to adjust them. I found a hex screw in the shock body, twisted it, and quickly twisted it shut when I thought I heard gas escape. I was thinking about sending the rear shocks off to be revalved, just to be sure, but maybe I'll try this instead.
ReplyDeleteHow much effort and time would it take to dyno and "gas up" a shock?