
Somehow, there are only 2 posts about this car even though I feel like I've done a bunch of work to it. It turns out that I've started on a lot of different parts of the car, and since I haven't really done anything to completion, I don't feel ready to report on it. Well, too bad for me; I've done some stuff and if I don't write about it, I'll forget about what it was. On with the story.
Uh...where did I leave off...?
Engine and Transmission
I went through a lot of my trademark waffling when trying to pick a drivetrain for this car. My first thought was to do a 4AGE, since it would be kinda period correct and it's a solid motor, but it's pretty ancient by now. At the other end of the spectrum, it'd be cool to do a small block Chevy because they apparently go with everything. However, an LSx is pretty heavy. I know that's the cliché that people cite when they say that builders are "removing the soul" from some lightweight sports car, and then somebody points out that it's only a 50 lb weight gain over stock or something. Admittedly, those motors are light for what they are, but modern four-cylinder motors are still substantially lighter. In addition, the Chevy V8's need huge transmissions and the giant torque numbers will require something like an 8.8" rear axle (and if you've been following along, you've seen that I've already decided on a dinky little 7" thing).
So with these points considered, I ended up deciding on a Ford Duratec/Mazda MZR inline four cylinder. It's a very light all-aluminum engine with efficient head design and it's ridiculously common. This engine architecture is used in the Ford Focus, Fusion, Escape, Ranger and Transit Connect as well as the Mazda 3, 6, Tribute, B2300, and even the MX-5 Miata (there are probably a few I'm forgetting there too). It also comes in a whole bunch of different variants, ranging from a 2.0L in the Focus and MX-5 up to a 2.5L in later Mazdas. I decided on the 2.3L variant because it seemed like a good size for a turbo motor, and because it's readily available in a RWD configuration from the pickup trucks and those pickup motors don't have balance shafts, so they're a little lighter and more efficient. Uh...so it wasn't super well thought out, but these engines are popular and frequently used in swaps and in motorsport applications...though mostly in Europe. So I bought an engine out of a 17K mile Ranger from a junkyard. I'd put a picture of the acquisition phase here if I was significantly better at documenting what I do, but I'm not so instead here's a picture of me trying to stuff it into the car!

I also needed a transmission, obviously to do transmission-y things, but also so I could determine fitment in the vehicle. For this, the only longitudinal manual transmissions that bolt right up to your average Duratec are the Ranger 5-speed and the MX-5 5-speed and 6-speed. I decided against the Ranger trans because it has truck-y gear ratios, and decided on the MX-5 6-speed because they're apparently a lot sturdier than the 5-speeds. Heavy though. So I got one of those too.


And even took a picture of it and the box that it arrived in on my doorstep
Eventually, I bolted those two things together, and tried positioning it the way I wanted it in the car. Unfortunately, that transmission is gigantic, so I had to do a lot of uh...clearancing to make it fit.

This gets less ugly later. Not much less though
I bought some polyurethane bushings from some off-road shop, machined a couple of billet mounts for the engine and fabricated a steel thingy for the back end of the transmission. Oh, another detail of this particular transmission is that it uses what Mazda calls a "powerplant frame" or PPF, so instead of attaching the transmission to the body, it runs a huge beam down the length of the tunnel to attach it to the diff nose. My RX-8 actually does this too. What that means is that the mounts on the transmission are weird, so the interface I made for it is weird too.


That tunnel brace will have to be a lot beefier. Also, these photos suck
That's cool. I have a different engine firmly bolted into this vehicle now! Somehow, I also did this in the middle of winter with this much space in the garage:


I suppose I could have turned on the lights for this photo op
Oiling
Very quickly, oiling became a serious problem for this particular engine/chassis combination. The first problem is that the Ranger uses a rear-sump oil pan, while the Starlet uses a front sump. That means that the Starlet's front subframe (really just a crossmember in this case) exists in space where the oil pan would like to be. The other issue is that the MX-5 transmission demands that the engine be tilted ten degrees toward the passenger's side of the car, so the oil pan would be crooked anyway. The MX-5 pan would be oriented correctly, but the sump clearance problem is even worse. So those pictures of the engine in the car also show the engine with no oil pan. Clearly a problem.
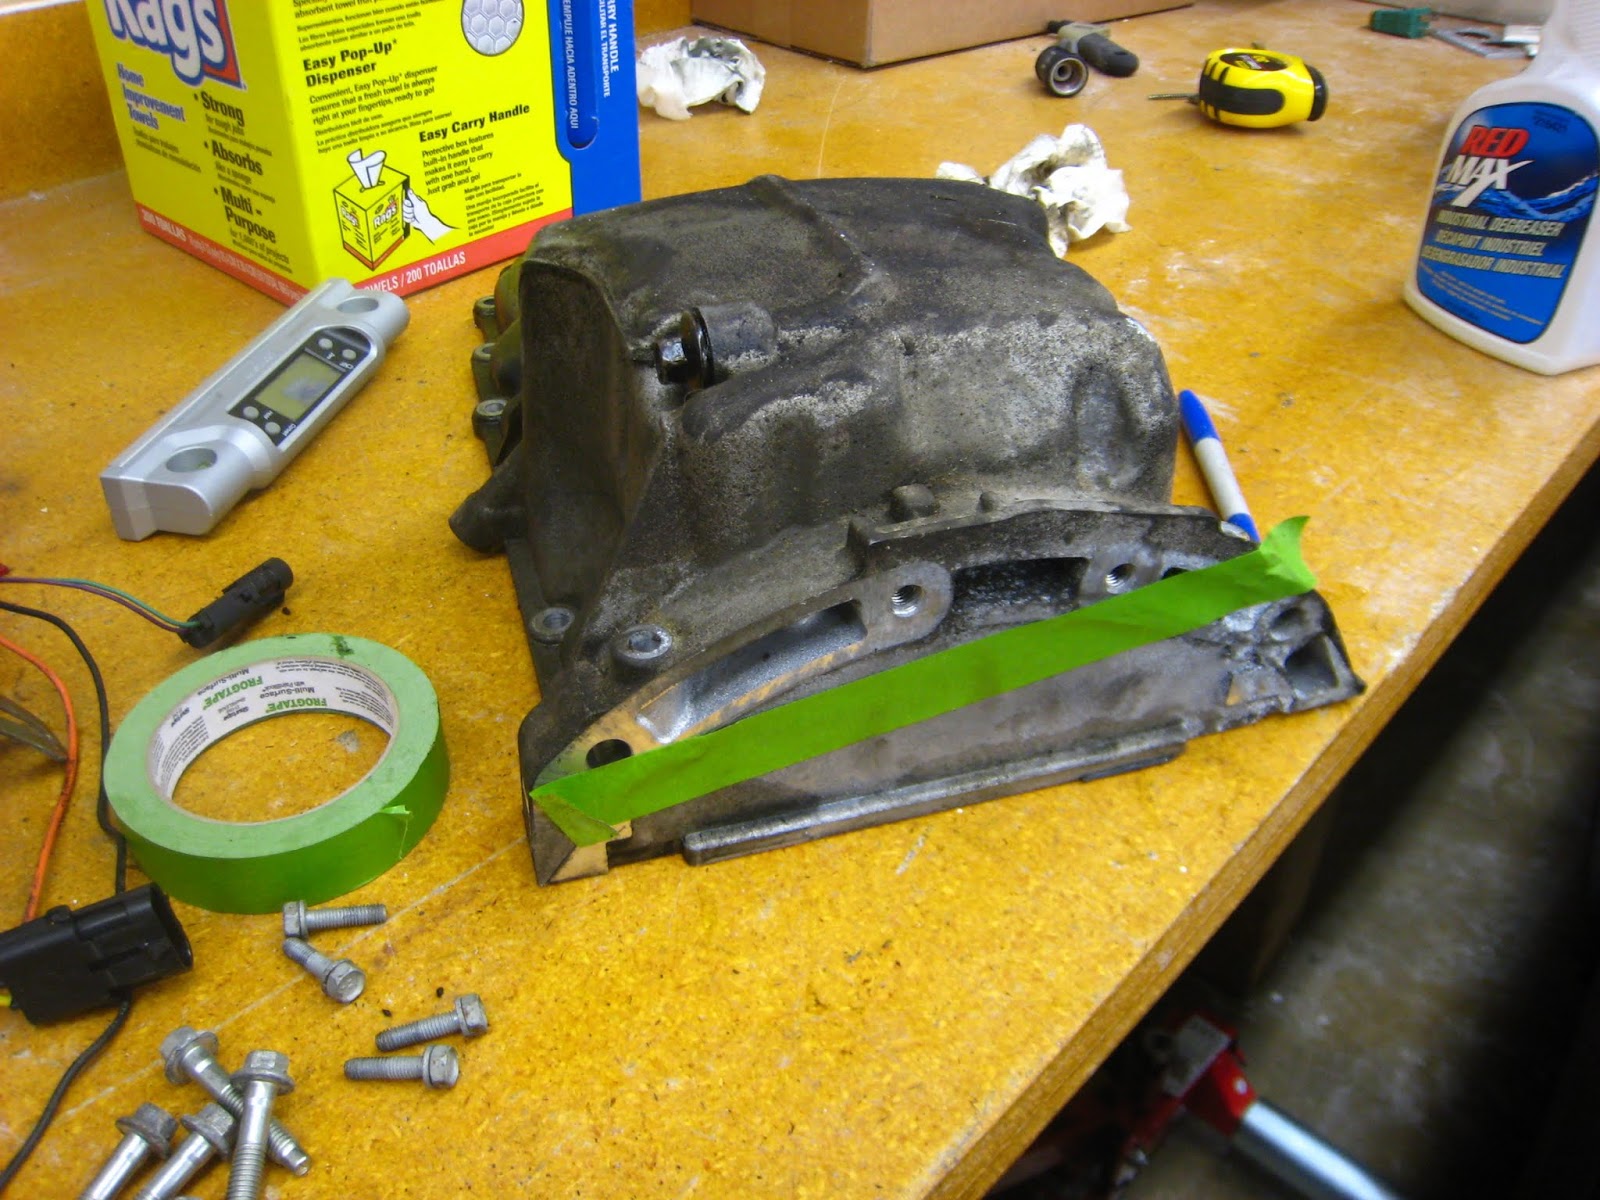
This is the best shot I have of the stock Ranger pan. It's maybe a little ominous
What do you do when nobody makes a pan that will allow you to do the engine swap you want? I don't really know for sure, but my guess is that you cut up the existing pan until it fits and then fix the problem with welding (the way I fix most of my problems). In the photo above, I needed to remove almost everything above that green tape line. Here's a view from the bottom of the car with the pan hacked up to fit:

Note that you can see into the engine around the middle of the photo
I also had to cut off everything else that was left so I could put a sump up front. I then got to work reconstructing the whole thing.


Incidentally, the oil pickup also had to be relocated from the back to the front, so I left the bottom off the pan so I could see where it was going.


Incidentally, the oil pickup also had to be relocated from the back to the front, so I left the bottom off the pan so I could see where it was going.


I finished off the bottom of the pan and filled it with water to determine how grossly short of my desired capacity it was. The sump is very small because it's a lot shallower than stock for ground clearance, and the crossmember eats up a lot of the volume I'd like to use. I ended up with something like 3.1 quart capacity, which is less than the 4 quarts that I'd like to see (based on no real science).

Looks nice, but sadly too small
The only option I had at this point to add volume was to add wings to the sides. Wings are a bit of a pain because they make it very difficult to access some of the bolts for attaching the pan to the engine block, so I tried to make sure that I left a decent amount of clearance for fishing bolts in and out. I simply cut some slots the sides of the pan with a plasma cutter (to let oil flow in and out of the wings), bent up some C-shaped things and welded them on.

I also needed a drain plug, and I rather liked the stock arrangement, so I cut that corner off the old sump and welded it on.

A dipstick is a nice thing to have too, and you may notice from two photos above that the dipstick hole in the side of the pan leads to an area that is not inside of the pan itself, so I turned a dipstick bung on the lathe and welded that in...

I then closed up all the holes, checked for leaks and checked capacity again to find that I was just a little over 4 quarts. I'll be running an oil cooler and maybe an Accusump too so I'll have a bit of extra capacity with those. The pan still needs some baffles and a windage tray, so it's not done, but it's at a point where it keeps crap out of the engine and tells me what I need to know about fitment.

Probably the most complicated fabricated aluminum thing I've made to date
On to the next oiling problem! You may or may not have noticed in this picture:
that there is a machined spot with some oily holes in it by the U-joint at the end of the steering column (that thing that looks like a rusty funnel on the right side of the photo). That's where the oil filter take-off used to be. It wants to be right where that steering shaft is, and the filter itself wants to be where the steering rack is. Obviously that won't work either, so a remote-mounted filter is in order. Unfortunately, most filter relocation kits still attach to the existing filter mount, so I would have to make something once again. I also didn't have a whole ton of clearance to the steering system, so it would have to be fairly low-profile. I did some measuring of the stock part, made a CAD model, stuck a chunk of aluminum in the big machine, bought some AN nipples, did some welding and made myself a cool filter take-off. I still need to buy some expensive hoses and a filter mount, but at least I know that the engine fits! Naturally, I have no photos of it installed...


I've done a bit of other stuff too, but this has gotten quite long, so I'll leave it here for now.