ICEngineering Subjects

Showing posts with label Projects. Show all posts

Thursday, August 6, 2015

Autocross Corvette: Introduction

Photo credit: Andrew Wong

It's been a loooong time since I've written anything here. I guess motorsport has gotten pretty routine for me in the last couple of years. I autocross a lot and do ok but not great, and it doesn't feel like there's much of a story there. The RX-8 has been a great reliable autocross car and it just hasn't needed any work. Which is boring. That's about to change, because it's getting transformed into a whole new car, but that's a story for later. This is about what I'm doing during the months that the RX-8 is in pieces.

About a year ago, Allen (who has the cool SSM Miata in #1 here) and I decided to go halfsies on a new autocross car. My motivation was to learn to drive something with some power, because hopefully some day the RX-8 will have power and I'll have to learn how to use the intermediate positions of the gas pedal. Also, I've been autocrossing the RX-8 ever since I started autocrossing back in 2007 so it'd be interesting to try something new. We wanted this to be fairly easy, so we decided to get something that would be fun and competitive to run in the "Street" (formerly "Stock") category, but since it would be a dedicated toy, we wanted something that is actually a sports car. Basically, we didn't want something slow with lots of doors and seats and stuff. But we're also cheap. Our top candidate was a C5 Corvette Z06, but we eventually settled for a non-Z06 C5 Fixed Roof Coupe (FRC) because it was very inexpensive. The FRC is missing 1" of wheel width front and rear, about 50 hp and a little bit of suspension stiffness when compared to the Z06. But it's otherwise a very similar car. We figured that with the street tires that we are required to run, we wouldn't miss the hp too much, and the FRC looks like it's a very competitive car to have for the "B Street" class, while the Z06 looks like it might be lagging a little bit compared to its C6 brethren in "A Street."

I added the vinyl, but the ugly wheels were included with the purchase!

Turns out it was cheap for a reason. First of all, the steering felt really bad, so as we went to adjust it, we discovered that the rack was broken and I had to replace it. Then we bought some wheels and old tires plus a used set of Z06 shocks for it and took it to an autocross in Ohio where it promptly overheated, the clutch slipped, the brakes went to mush and it generally drove like crap. From there, we replaced the engine's harmonic damper (which required removing the steering rack again), tie rod ends, brake fluid, rotors and pads, and upsized the front sway bar and took it to another autocross in Oscoda. It seemed like we fixed all the problems, but the old tires were definitely ruining the driving experience and we weren't buying new ones because we knew that a new crop was coming for 2015. So we played around with it on junk tires and then put it in storage for the winter.

Grip was poor

The first thing we picked up for the car in 2015 was a set of Koni Sport shocks. The "cheap" Konis for the Corvette are actually a pretty nice set of rebound-adjustable monotubes, but they aren't all that cheap at ~$1100 for the set. And because the rules allow it (also because this blog would be boring without some fabrication), I built a set of spherical bearing lower eyes for the fronts.

Obligatory lathe picture

These parts probably don't gain us much, but it makes it more like a race car

We also bought another 1.5 sets of wheels so we could test tires. This year, Bridgestone and BFGoodrich really upped the ante by releasing the unbelievably grippy RE71R and the Rival-S respectively. We're ambitious people, so we bought a set of each. The Corvette wears 17x8.5 wheels in the front and 18x9.5 in the rear, so we ordered each set with 255/40/17's for the front and 275/35/18's for the rear. Interestingly, both manufacturers had some supply problems, which meant that we ended up getting the 255 Rival-S for the front and the 275 RE71R's for the rear while the others were back-ordered. We started the season out that way, running a few local events with mismatched wheels and tires. The car was amazing with pretty much no tuning, and even on the tight courses at our local sites, we were consistently getting great results.

Cool wheels, right?
Photo credit: Andrew Wong


We eventually got our 255/40/17 RE71R's for the front, but after BFGoodrich kept pushing back the ship date on the Rival-S for our rear wheels, we eventually canceled that order and instead ordered another pair of 275/35/18 RE71R's to squeeze onto a pair of 18x8.5 front wheels that we bought. SCCA Solo's Street class allows a +/- 1" diameter change for wheels, so we took advantage of that to get a wider front tire.

It's a tight fit

We took the car to a test-n-tune in Indiana to test our three different front tires, and found that we hated the narrow RE71R's, loved the wide ones and the Rival-S were fast but weird feeling. All ran very similar lap times, but the wide front tires did it most easily, so we decided to use those for events that we care about a lot, and to burn up the other tires at local events because it's more cost effective than selling them.

Since then, we've done a lot of autocrossing with extremely good results, though we weren't able to hit any national events until deep into July when we attended the Toledo Match Tour which was a great success. We managed to take 1st and 2nd in class competition in spite of lots of rain and bald tires, and we both qualified for the "Super Shootout" which is a bracket competition in two senses of the phrase. It's set up in a tournament-style bracket, but it's also run like bracket drag racing where drivers are run against their "dial-in" times from the qualifying round. So you basically want to beat your own dial-in time by more than the other guy beats their dial-in time. I knocked myself out when I was paired with Allen by hitting a cone, but Allen took that opportunity to go and win the whole thing!

This is Allen's winning face
Photo credit: Andrew Wong

Just this last weekend, we ran the Wilmington ProSolo where we faced some more good competition in our class and again managed to place 1st and 2nd on tires that really have no tread on them.

This is before we put 26 more runs on them

So all in all, we're feeling pretty good with one more Champ Tour coming up in Wilmington and then the National Championships in about a month. I think that if I don't screw up too badly, I can take a decent trophy position, and Allen has a real shot at the championship. Let's see what happens!


Wednesday, March 13, 2013

STX RX-8: Diffs and Dampers

 
As detailed in the last post, I bought a bunch of stuff. Of course, I don't like to make things too easy on myself, so it wasn't as simple as bolting on the Koni 2812's and sticking the OS Giken diff in the rear end. Let's start with the dampers.

The dampers were mostly good to go right out of the box, but I wanted some work to do. The first thing I did was have my friend Allen (who owns the turbo Miata discussed here) run them on a shock dyno along with my old Koni Yellows so that I could baseline them and determine how healthy they were. I got a bunch of cool charts like this:


This was also helpful because it told me that one of the dampers was a little low on gas pressure. For those who don't know, gas charged monotube dampers like the Koni 2812 have a floating piston inside of them that moves up and down to allow the fluid chamber volume to stay constant as the piston rod enters the shock body through the damper's stroke. The floating piston is pushed on by high pressure nitrogen gas so that when the piston rod leaves again, it doesn't induce vacuum in the fluid which would cause air bubbles to precipitate out and make the damping forces really unpredictable. That's all clear? Good.

I could get the whole set rebuilt at some crazy cost, but since I'm cheap and don't like shipping stuff, I decided to just leave the old fluid since it seems to be damping ok and simply refresh the nitrogen gas charge in all the dampers. That sounds pretty simple, except that to keep a low profile on the damper body, Koni's charge port is just a hole with a bolt in it, which unlike a schrader valve has nothing to to thread a fill tool onto and requires a bunch of rotation of a socket head screw to open and close the "valve."

So I went to Harbor Freight, bought some cheap locking pliers and made a tool!

 
It's not that clever, since it's just copied from pictures I found of the actual Koni tool.

That upper part with the valve and knob sticking out of it creates a sealed chamber around the fill screw once it's clamped around the shock body, and then the knob is attached to an allen key sealed to the chamber for opening and closing. The idea is sound, except even with the smallest chamber that I could reasonably make, it still required 30+ pounds of pushing against the gas pressure to get the allen key seated in the screw and was also a little bit finicky about sealing against the shock body. So thanks to Allen for dealing with that for me!

So now the shocks are good as almost-new (which is different from almost good as new). Another annoying thing is that the adjusters for the front dampers are pretty hokey looking for super high end shocks. As far as I can tell, damping adjuster knobs are like the pride and joy of many damper manufacturers. They're usually really pretty machined and brightly anodized things. The Koni adjusters are basically nuts.

They're so tiny, I couldn't even turn them by hand!

Given how lazy I normally am, I probably would have just left them. However, one of them was lost in shipping and Koni wants $12 for these things! Really not so bad, but it was an excuse to make something cool. A little bit of machine time later, I had some nice knurled aluminum knobs that I didn't need tools to operate (picture later).

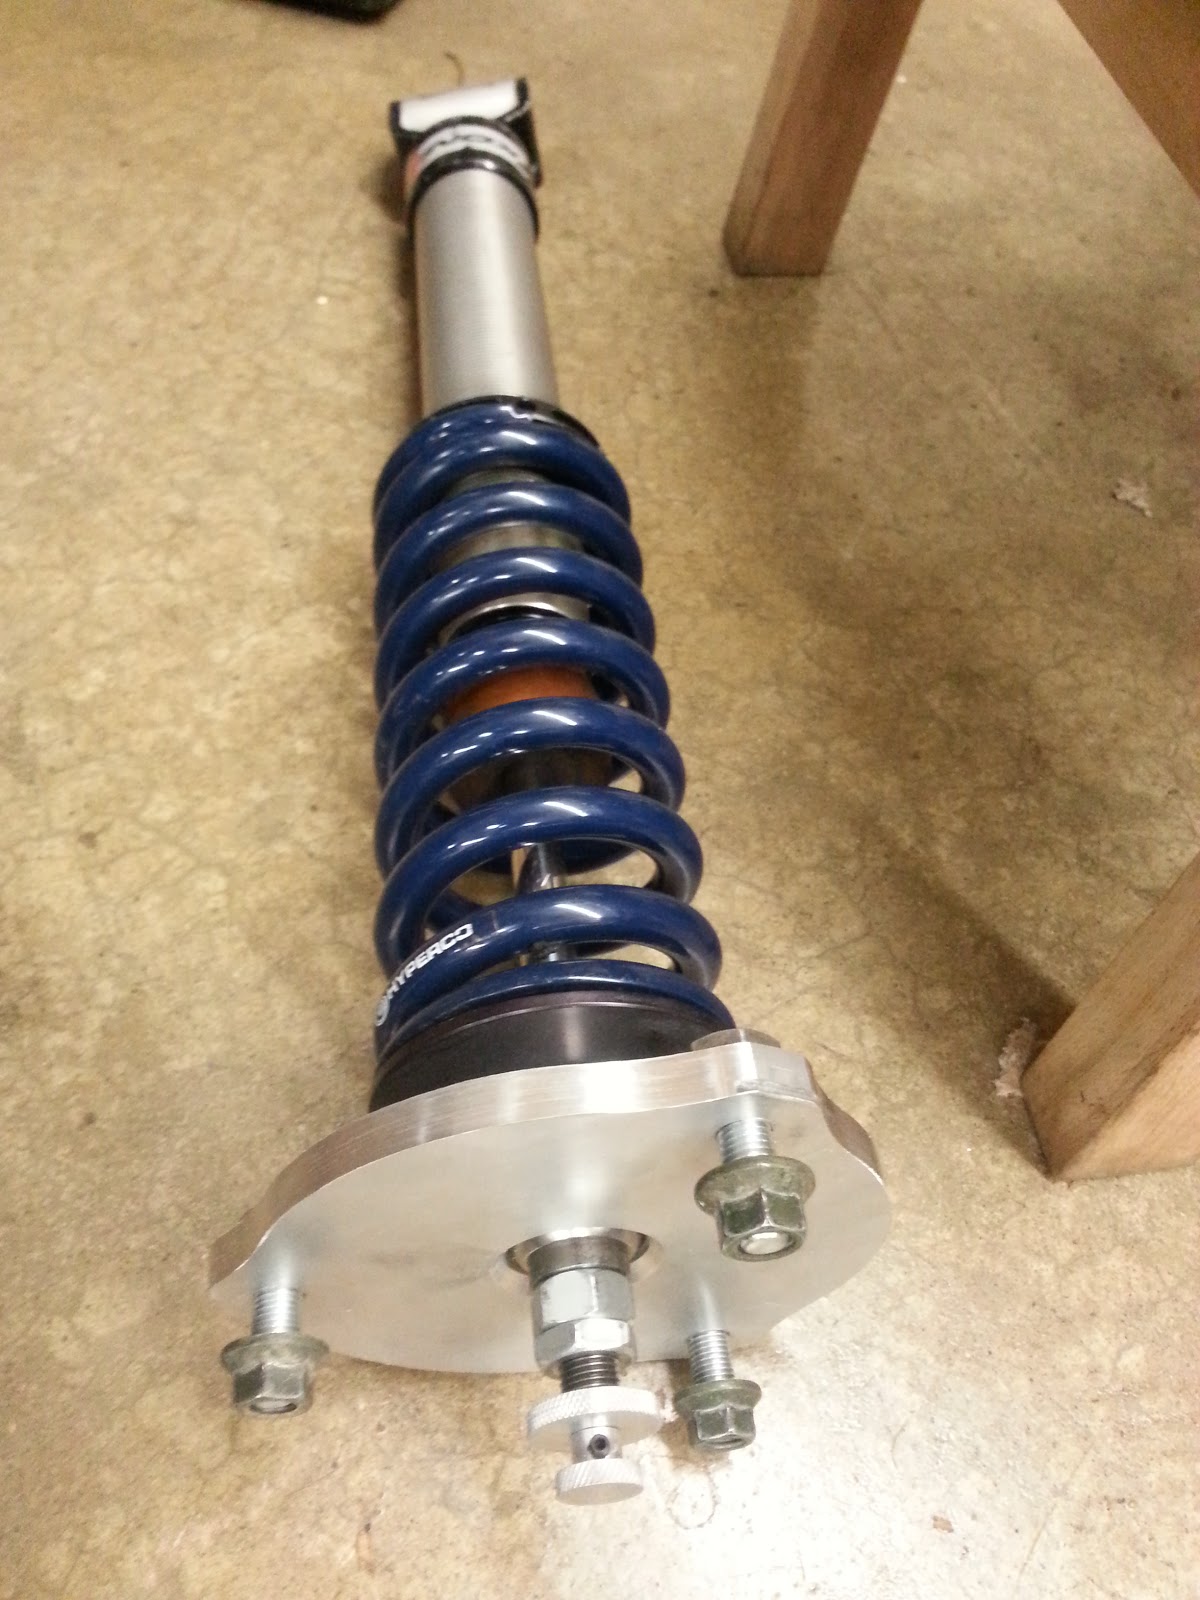
The last thing is actually something that I had put off from last season. I had installed spherical bearings in the rear shock tops, but that was easy stuff because it only needed very basic manual machine operations and a little bit of welding. The fronts would need new top hats made from scratch, so I actually got through about 1/3 of the fabrication on those and then set it aside for some reason. I decided to pick that back up and finish it. I first tried the lazy approach which was to finish them up with only a lathe operation.


But it turns out that shock tops are shaped like almost-triangles for a reason, and the reason is that circles don't fit. So I fired up the big machine and made them nice looking.


With those all done plus the fancy new adjusters, I assembled everything together for a nice photo.


Now on to the diff. This was pretty much just a bunch of wrenching. Step 1 was to take apart everything out back.


I actually disassembled more than you'd need to for just the diff, but I also wanted to change out my wheel studs, which for some stupid reason requires dismantling the rear upright and ruining a perfectly good set of wheel bearings. So Rob and I spent a couple of quality hours with a press doing that...

 This is what happens when you try to remove the hub. The bearing is wrecked.
 But it's nice enough to leave the race stuck on the hub...
 Which needs to be carefully ground off
 Just so I can put in some studs
 Installation is the reverse of removal... 

With that taken care of, we pulled out the diff and swapped it for the OS Giken unit. I really really didn't want to mess with setting lash because the RX-8 uses swappable shims to set both lash and bearing preload, and I didn't want to buy any, so I was just hoping that the carrier-bearing-to-ring-gear-mounting-distance would be exactly the same as stock...

OS Giken on the left, stock Torsen on the right. Height gauge in the back.

Turns out it was! So that was easy enough. We checked the lash just in case, but it of course required no adjustment.


A few hours in the garage later, and we got the rear end all buttoned up again.

That's Rob. People have trouble telling us apart because we're both Chinese.


Now it pretty much just needs an alignment and a wash, and it'll be ready to go a Test-n-Tune in April.

Tuesday, February 12, 2013

STX RX-8: Ramping Up For 2013


The 2013 Solo season is fast approaching, with the first event of the year being a Match Tour in Wilmington, OH on April 6th. That's a national level event at a new highly anticipated site, so it should be very popular and a potentially very demoralizing way to shake off the cobwebs.

In anticipation for things to get going again, I've been buying/making a lot of stuff so hopefully the car will be even better than it was last year. It's costing me a lot of money, so it had better be worth something!

#1: Dampers

I detailed a little bit of the build-out of my single adjustable Koni Sport dampers in an earlier post. That was pretty much the cheapest way that I could come up with to get a decent set of coilovers on the car, and those shocks have served me very well over the past 5 years. They definitely have some issues, like needing to be removed from the rear of the car to adjust rebound (so I pretty much never do it) and not having enough damping to control wheel hop on launch. They are also the same length as stock, though my car is nearly 2" lower than stock, so usable travel is pretty small, and it turns out that there's a reason why the stock spring is so huge in diameter, because the small-diameter race springs rub the shock bodies over bumps. I've dealt with these things for 3 years, so it's not like it's killing me, but my expectations for results have been raised significantly due to the car's performance last year so I was pretty set on a damper upgrade.

At Nationals, I had poked around the paddock a bit to see what kinds of dampers people were running so I could get an idea of what the fast guys did. I decided that I wanted something double adjustable (rebound and compression) and preferably a monotube so I could run the rears inverted and not have to deal with the springs rubbing. Those two requirements immediately put me up in the Moton/Ohlins territory that was greater than $5000 for a set of dampers.

Instead, I decided to take advantage of the modular construction of my existing dampers and I would have them revalved with higher damping rates and converted to double adjustable or at the very least, have the rear rebound adjustment be made external. This would run me about $1200 and wouldn't fix all of my problems, but it captures 90% of the improvement that I was looking for at about 20% of the cost.

This all changed when at the end of October 2012, I stumbled upon somebody on RX8club.com selling a set of Koni 2812's. These are Koni's top-of-the-line double adjustable aluminum bodied monotubes with some extra-fancy proprietary valving arrangement. They weren't cheap, but they also weren't $5000, so I waffled over it for a while like I always do about big purchases and then bought them.

Old vs New
 
So that's a big deal. I've done a little bit of stuff with these, and that'll be detailed later, but I'm pretty excited to see how this will affect performance.

#2: Limited Slip Differential

Another gigantic purchase that I had been seriously on the fence about is an upgraded differential. The RX-8 comes with a helical-gear Torsen-style differential which is theoretically great and it works pretty well, but it's totally untunable and I don't think that it's quite right for what I need the car to do. This is a tough decision similar to what I went through with the dampers because I know that the existing solution works, but there are better solutions out there. Unfortunately, it's nearly impossible to quantify the benefit of those better solutions, making the cost/benefit ratio indeterminate.

So...I decided to just bite the bullet and get the best/most expensive diff available for the RX-8; the OS Giken Super Lock LSD.


It took me a while to figure out what was going on inside the OS Giken diff that was not happening in other clutch type diffs like Kaaz and Carbonetic, but when I finally got it, I deemed that it was enough difference to warrant the $500 cost difference. I hope that's true. And I'll never know if it is, so it doesn't matter.

In preparation for this, a good friend Rob and I pulled the car out of winter storage (wherein it is nearly touching the south wall of my garage to make room for the Starlet) and stood it up on stands to begin the brutal dismemberment of the rear end of my car (again) so that we can get the diff out.

The car is unbelievably dusty

Again, there will be more on that later.

#3: Wheels and Tires

I've been running on these cheap but heavy 5Zigen FN01-RC wheels in a 17x9 +43 wheels for a few years now. I got them because they are crazy cheap at around $800 for the set. They also look pretty cool, and I got them at the same time that I got wheels for our white Fit so both cars that we had at the time would match.

Somehow I don't have a picture of the two cars together

However, without exception, anyone who has been nice enough to help me change wheels at an autocross has commented on how obscenely heavy my wheel/tire package is. I've been tempted to buy some lighter wheels for a while but just like with the other upgrades, it was difficult to justify the cost when I already had a workable solution. I got lucky when fellow SE Michigan STX RX-8 driver Brandon decided to sell his Enkei RPF-1's at the end of last season so that he could fit a big brake kit. So now I finally have light wheels. Plus they're gold which is super sweet.

And they've been stored in the car since October

As for tires, there is currently a street tire arms race going on with Dunlop and BFGoodrich having already released their latest and greatest ST-legal tires and there have been talks of an entry from Bridgestone and possibly Kumho. I'm not sure what to do about that yet, so I'm going to wait and see if anybody gets some good testing in before I need to buy tires.

So that's a quick overview of what's happening with the RX-8. I'll get more in depth into some of this stuff when projects start getting completed. I really hope the car will be faster!

Monday, February 11, 2013

Two-Strokes and Electrics


Last kart day of the year, Oct 27 2012!

I'm finally getting around to rebuilding the kart, which has been a spectacular autocross and level-1 fun (fun the whole time) success.  The thing's a blast and a workout - driving it helps slow down the other racing, and the physical requirements helps motivate to get stronger.  True, I haven't gone wheel-to-wheel in the kart yet, so I'm certainly no real karter...

My kart reflects that a little.  I got it used, great deal, great working condition, but it's well-worn.  The frame is Trackmagic, a brand known for it's complete lack of support with some odd-sized parts (need to machine a new lower steering column spacer for next season...), and has mismatched knuckles, some welding on it, etc.  The engine fires on the first couple compressions but the inside of it was otherwise a mystery on purchase. 

So rebuilding the engine was interesting, it was the first time I'd seen what modifications are done to it.  The answer is not many...the ports are smoothed, but stock shape and size, transfers are all stock, compression is stock.

As usual, first step is turning working things into piles of gears
Look at all the 2strokes...
Tray 1 of 2. So many parts for such a simple engine!

What's most interesting is the damage found, there's been some fairly impressive detonation history.

Interesting piston damage

I'm still learning what is normal and what is not for this kind of engine and use.  For instance, in the head, I think the damage below is actually normal-ish for extended use!  Comparing the detonation on the head to the piston, I actually think the piston has been swapped after most of that head damage was done, but the previous owner just kept using the old head... let me know if you think otherwise.

Detonation never looked so evenly distributed
Also detonation around top of cylinder, apparently normal (and some lower in the cylinder?...strange)

I ordered a new piston (fancy Wiseco GP, forged) with rings, and I have a new head...that's it for the cranktrain!  It'll go back together with the old cylinder, and the bottom end is good.  Looking for a stock ignition now to get rid of some ballast, and maybe will increase compression ratio by machining the cylinder in the summer if I'm feeling comfortable.  Only thing keeping the kart engine from reassembly is some transmission small parts still on order...about $100 worth of tiny overpriced washers and bushing which I had damaged the first time I ran the kart...without trans fluid...

I'm slapping it back together because again, the purpose of this thing isn't top-level karting, still just practice and experience.  I'd decided to keep this kart and engine going until 4-strokes were legal (expecting 1-2 more years for autocross) and then go in for some nicer stuff.  I am looking forward to racing a kart with less oil burning and noxious pollution.  It would be nice for my interests in car racing and mountain biking to be less opposed, not to mention becoming less of a giant tool who selfishly contributes to ruining the world by purposely running unbelievably polluting things for fun...


However, now I don't think I'll ever go 4stroke.  I think my next kart will be electric. (And yes, I am concerned about battery manufacturing and disposal, jury is still out)

The 86g soft LiPo battery in this costs $7 and is rated to 30amps at 8.4V!  Battery technology is truly improving

After taking custody of one of Kenneth's older RC cars needing only a once-over and a battery, I have been impressed by the capability now so easily available.  The above battery is essentially rated to 1/3 hp, costs $7, and weighs less than 1/5th of a pound.  It's what's called a lithium-polymer battery, a simplified description of its chemistry.  These have disadvantages in their volatility though.  For application in larger packs, a different chemistry is introduced, LiFe.  I don't really know my history, but I understand A123, the highly-government funded company which has gone bankrupt and just been sold to Chinese investors, is primarily responsible for them.  Among many different characteristics, they are also very resistant to becoming...overactive after being damaged.  You could drive a nail through a LiFe battery pack, and wouldn't expect it to react violently.  A LiPo cell would violently burn and burst, and the chemistry we're used to in cell phones and laptops, lithium-ion, would do similar.  The LiFe cells are what's used for the current generation electric cars.  These are the cells in the Chevy Volt, the Tesla Model S (not the old Elise-based roadster, those were the laptop-type) and also in Zero Motorcycles.  Compared to lithium-ion, LiFe also allow for higher discharge rates, similar to LiPoly.  This is good for Zero Motorcycles, and good for aftermarket, because it allows power to be achieved through amperage instead of voltage.  This is a lot safer to people if anything goes wrong and the electricity tries to short though the user.

Power, Watts, is (volts)x(amps): 1hp is 746W, and that can be achieved with any combination of amps and volts.  It's just that with dry clean hands (which have great electrical resistance) under 100V is generally not enough motivation to hurt a person.  300V on the other hand could be much more...fatal.

So we now have the technology in the battery, and the voltage isn't scary.  The hardware is available.  Additionally, the hardware is available assembled, wired, programmed, and even warrantied!  Motorcycles have donated the 2strokes we use in the karts, and now Zero Motorcycles make their electric drivetrains available to anyone.

This is the 2012 stuff.  2013 has much improved battery packaging

After heavily flirting with the idea, I won't be going electric this year.  Maybe in another 2.  The required components currently cost ~$8800 and the battery to power the 44hp 35lb motor still weighs 85lbs.  I'm excited though.  I am lucky enough to know electric cars can be seriously fast, and now with the market moving as it is, I expect batteries will rapidly improve in both discharge rate and cost.

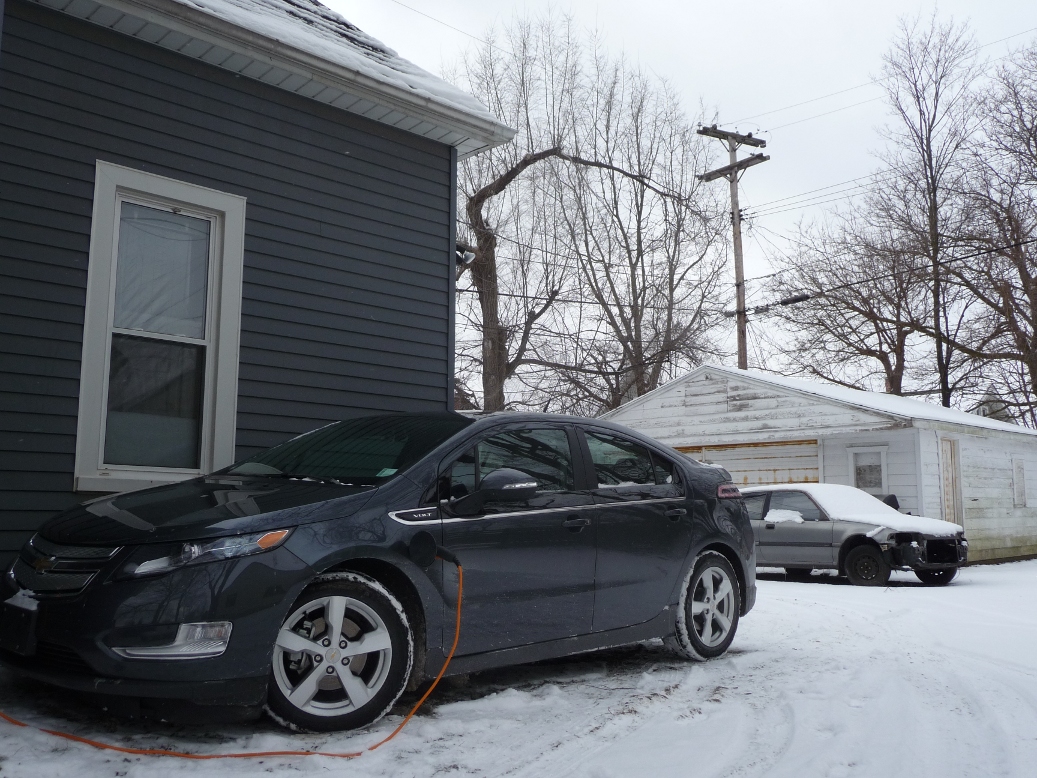
Lucky me, I know electric can be seriously fast.  And this one is ancient compared to the Volt.

For all the bad press, this one is great to drive.  And I partly love it for the battery progress it's driven.

Monday, December 17, 2012

Project Starlet: Rear Axle Build-Up


 A lot has happened on the Starlet since I introduced it like a year ago, but not really as much as I'd like. During the autocross season, I don't really get much done, so now that that's over, I've been digging into it a little more. I'll get to a major-ish update later, but since I just built up the rear axle, I'll post about that now.

The Starlet comes with a solid axle utilizing a tiny little 6" ring gear and it's held on with a triangulated four-link suspension. This is the same kind of suspension as the "quadra-link" that was used on Mustangs up until the S197 was introduced in 2005. Unfortunately, it is also not-so-affectionately known as "quadrabind" because it demands a lot of deflection from its bushings in both roll and ride motions, so stiffness would increase significantly with suspension travel, causing all kinds of dumb handling problems. The Starlet is no different, except that it's an economy car so nobody cares.

Well, I care. So part of the plan for this car is to basically scrap the rear suspension in favor of a different design. Incidentally, I'm following what Ford did with the Mustang and replacing the four-link with a 3-link and a Panhard bar. While I'm at it, I'm also changing out the dinky little Toyota axle for something that won't explode when subjected to more than the 60 hp that it was designed for.

I ended up deciding on an axle from an '84-'85 Mazda RX-7 GSL-SE for a few reasons: It can handle a decent amount of power, it's not as heavy as common axles like a Ford 8.8, a GM 10-bolt or a Toyota 8", and it's a lot easier to find than an AE86 axle. There are other little factors like the fact that it shares a bolt pattern with the Starlet and comes with a nice clutch-type diff from the factory. That's probably true of the AE86 axle as well, but like I said, the RX-7's are a lot more ubiquitous especially in the midwest.

Check it out; a real ramped clutch-type diff!

I ended up finding a local guy parting out a GSL-SE, so I was able to just drive a few miles, stuff it in the back of my Fit and bring it home for a very reasonable price. It just sorta sat under my bench in the garage for a while, but I just recently took it out and slid it under the car to see what it looks like. It turns out it's waaay too wide, as it's about 5" wider from hub face to hub face, so on top of having to cut off all the brackets and weld on new ones, I also have to narrow the housing and get the axles cut down and re-splined.

So let's get to it. First, I stripped out the diff and axles and ground off all the tabs on the axle housing except for the pair used for mounting the sway bar which I've decided I'll keep for now. This took a long time and turned my garage floor black.


Then, I made all the tabs. Oh, I guess somewhere in here I also designed the suspension. That is surprisingly uninteresting though. Basically, I guessed at target values and saw how close I could get to them in a way that would be somewhat easy to implement. So I picked a super low ride height, decided that I would re-use the lower control arm mounting points and figured out the rest from there.Here are some of the tabs and things. I welded the panhard bar mount together off the axle to make life easier. I also have no confidence in my design, so I put in extra holes to allow for (very) coarse adjustment to things like roll center, anti-squat and roll steer.

These are lower control arm tabs (windowed for lightness!)

This is an adjustable toothy plate for mounting the panhard bar at various heights

After that, I hit the point of no return when I lopped the ends off of the housing. This is scary because they carry the wheel bearings and need to be nicely aligned to the center housing area, so they're not going back on without some work. I was smart enough to measure the angle of the brake mounting bosses first so at least I could get one thing right when I pieced it all back together.

One of my rare thinking-ahead moments

The final disassembly step was to lop off the extra width on the housing. I decided to take 2.25" off of each side based on some crude measurements that I took with the axle under the car. This was done in a crazy looking way by putting the entire axle housing in a bandsaw.

Can you tell that I love my digital angle finder?

That was a little scary, but after measuring 19 times and cutting once, it turned out about right. Meanwhile, I smoothed out the faces of the axle ends/bearing carriers on the lathe so I could weld them cleanly to the axle housing.

It wouldn't be one of my updates without a picture of this lathe

While I was on the lathe, I also made some dummy bearings to clamp into the diff carrier as well as to press into the wheel bearing carriers. These dummy bearings all had a matching hole in the middle through which a big straight solid steel shaft was passed through to ensure alignment.

I saw this great tip somewhere of using a factory scissor jack to level out the housing

After measuring another 100 times, I welded the ends on.


And then I welded on all the suspension tabs.


I made a lot of little plates to box them in too.

  
The panhard mount also needed some little tubes to give it some lateral stiffness since all of the rear axle's lateral load is transmitted into it.

A giant pain both to miter and to weld

And all of a sudden, a finished axle!

Actually, this took a ridiculously long time

I knocked out the alignment rod...and oh wait, the axle is super crooked!

For reference, the yellow end of the rod should be in the middle of that hole...

I was a little alarmed because I don't have the heavy equipment normally used to straighten axle housings. That usually consists of a gigantic I-beam, some big chains, a bottle jack and an oxyacetylene torch. Well, I guess I had a bottle jack in my truck, but those other things are important too. I had also heard of using an OA torch to heat up part of the housing and then quenching it with water to shrink that area and pull the axle straight. I liked this idea, but again, no OA torch. So I instead used the TIG welder torch to strike up an arc on the housing. Wandering the torch around a bit was enough to get a decent chunk of the housing cherry red.


And then a quick quench with a wet rag.

   This is a boring looking photo

A few iterations of this on each side, and I was able to slide the alignment rod in and out by hand. And there you have it, a narrowed and custom tabbed RX-7 axle housing.


I unfortunately can't cut splines on the halfshafts, so those will be sent to Dutchman Motorsports to get shortened. Then, with some work on the chassis end, and some money sunk into decent shocks, I should be able to bolt this thing up and have some rear suspension!